This is my first post. Here, I will go through briefly how to install Ubuntu on VirtualBox. This way, you can try Ubuntu without a hassle. Here, I am hoping that your system has enough free disk space (at least 10GB) and RAM (at least 4GB); the reason is that your Ubuntu will need to share RAM with your host OS.
First, download and install VirtualBox from https://www.virtualbox.org/wiki/Downloads
In this post, I am downloading VirtualBox 5.0.6 for the Mac platform.
Second, download Ubuntu LiveCD from http://www.ubuntu.com/download/desktop
In this post, I am downloading Ubuntu 14.04.3 32bit (i386).
Now, open up VirtualBox and create a new Virtual Machine by clicking New. Follow the screenshots below.
Now, click on Setting button and click on the Storage tab. Click Empty button under Controller: IDE. On the right, click on the Disk image button, Choose Virtual Optical Disk File, and choose the Ubuntu iso file just downloaded.
Next, choose the Network tab and change the option NAT to Bridged Adapter.
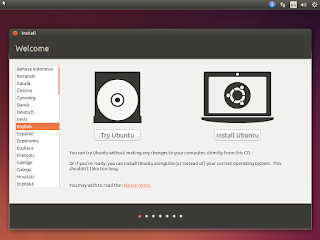
Now, click OK button and we are finally ready to boot up the virtual machine. Click Start button! Please be patient while Ubuntu is booting up. When the following screen appears, click Install Ubuntu.
Keep installing with the default selection until the screen below appears. Do not worry about warning message when formatting the disk; it is a virtual hard disk file that you will be formatting, not the actual hard disk. No harm to your host OS at all. Enter your info and root password. Make sure to write down the name and password you just entered somewhere, so that you do not forget. Continue on.
Again, please be patient while you are installing Ubuntu on your virtual machine. It will take some time to complete. Go take a walk or something. When it's complete, you will be greeted with the restart screen below. Restart it!


No comments:
Post a Comment